

The best biscoff cheesecake with a biscoff cookie crust, a rich biscoff cheesecake filling, topped with melted biscoff cookie butter.

This no-bake biscoff cheesecake is a dream come true. Everyone who has tried it has said it is the best cheesecake they have ever tasted. Hands down.
And it really is! It’s the kind of cheesecake that makes your eyes pop open in surprise when you first taste it, because you are thinking ‘wait a minute, is this the best thing I have ever tasted? Yes, yes it is!’
It’s super easy and fun to make and it’s a no-bake cheesecake too, so honestly it’s too easy.
And if you love easy cheesecake recipes then you’ll also LOVE our Greek yogurt cheesecake (only 3 ingredients!) our Golden Oreo cheesecake, passion fruit cheesecake and our baked eggless cheesecake so check them out too.
Ingredients You’ll Need For Lotus Biscoff Cheesecake:

Ingredient Notes
- Biscoff cookies. These cookies have a gorgeous caramel flavor and taste amazing crushed up for the crust of this cheesecake.
- Biscoff cookie butter. This is a creamy, nut-free spread with a similar consistency to peanut butter. It tastes exactly like the biscoff cookies. If you’re in the USA you’ll find it in most supermarkets in the same section as the peanut butter. Alternatively you can also use Trader Joe’s Speculoos Cookie Butter.
- Heavy cream. This is needed to create the stability of this cheesecake. If you’re outside of the USA then use a thickened cream or whipping cream. Basically it needs to be a high fat cream that will really hold its shape when whipped.
- Cream cheese. The best cream cheese to use is the full fat, brick style, firm cream cheese. Don’t use cream cheese from a tub. We love Philadelphia Cream Cheese but any brand that is full fat, brick style will work.

How To Make Biscoff Cheesecake
Full instructions and measurements can always be found in the recipe card at the bottom of the post. This is a summary of the process to go along with the process photos.
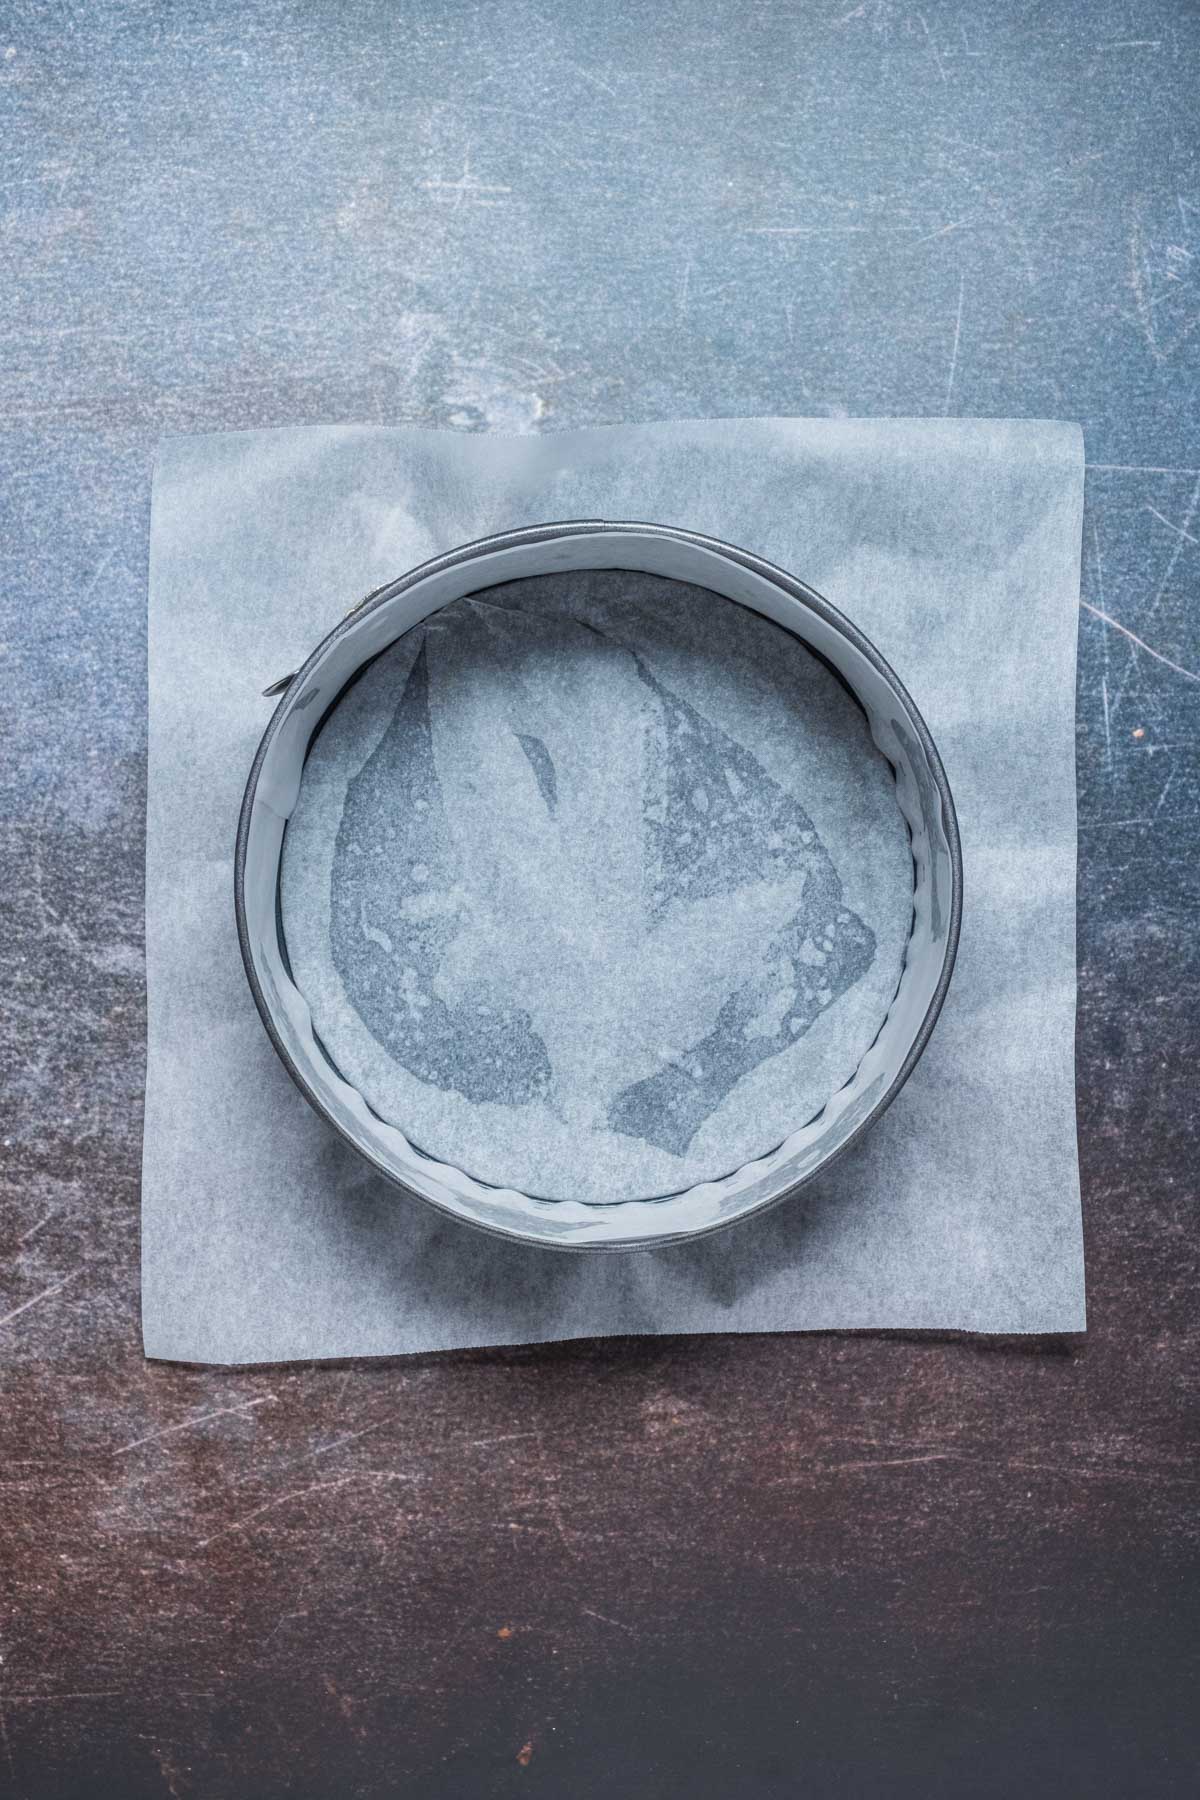
- Prepare your springform pan. Flip the base of your 8-inch springform pan so that there isn’t any lip on the bottom. This will make it easier to get the cheesecake out later.
- Now spray it with non-stick spray and then line the bottom with a square sheet of parchment paper. There is no need to trim the parchment paper to fit. Just place a square sheet of parchment on the bottom and then clip in the sides.
- Now line the sides with strips of parchment paper – this part is optional but does make it really easy to remove the cheesecake later.
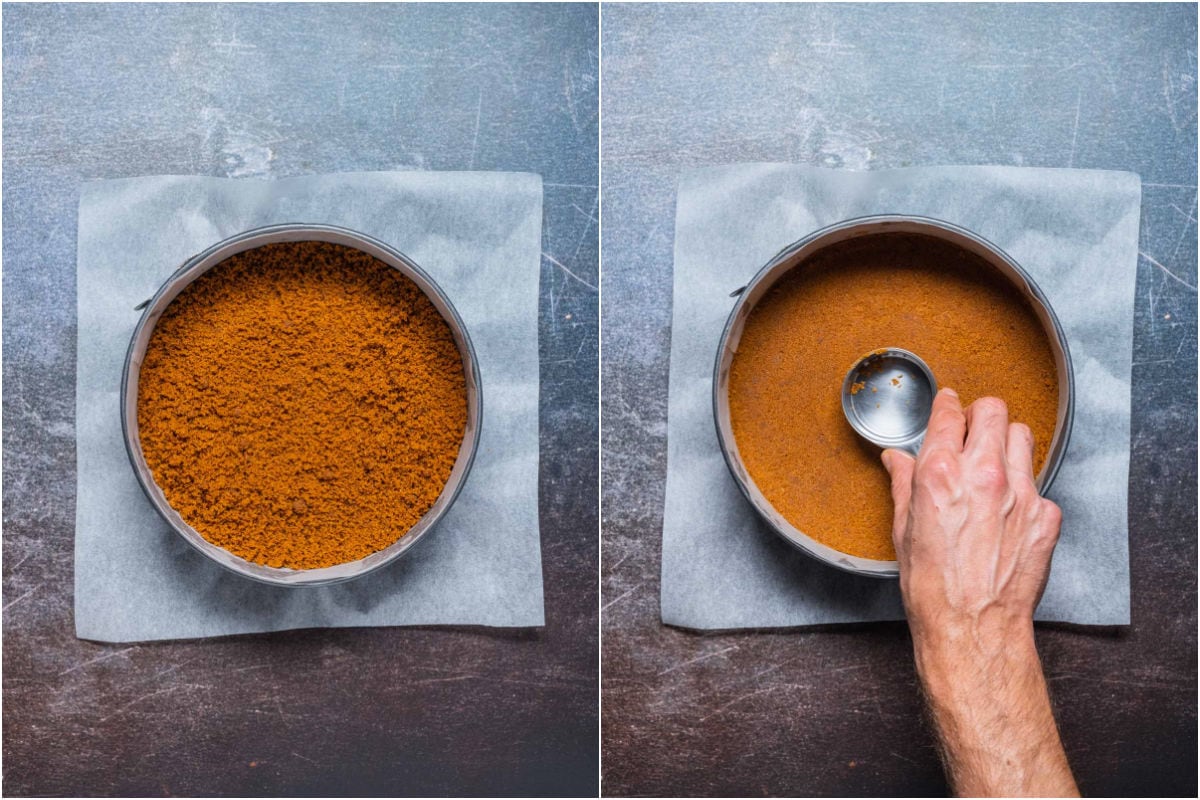
- Prepare your cookie crust. Add biscoff cookies to your food processor and process into crumbs.

- Add melted butter and process again until well mixed.

- Transfer the cookie crumbs to your prepared springform pan.
- Take a measuring cup and use the base to press down on your cookie crust from the top, packing it in tightly and making the top really smooth.
- Place the crust into the freezer while you work on your filling.
- Prepare the cheesecake filling. Add the cream cheese, powdered sugar and vanilla extract to your stand mixer and beat until smooth.

- Add in the biscoff cookie butter and beat it in until smooth.

- Now add the heavy cream and beat in until it’s thickened and smooth.

- Spread the cheesecake filling out over the top of the cookie crust and smooth down.
- Place into the fridge to set for at least 6-8 hours and preferably overnight.

- When the cheesecake has set, use the parchment overhang to easily slide it from the springform pan onto your cake stand and then remove the parchment paper.
- Decorate. Add biscoff cookie butter to a microwave safe bowl and microwave in 30-second intervals until melted. Drizzle over the top of your cheesecake and then sprinkle crushed biscoff cookies over the top.
- Place back into the fridge for 10 minutes for the topping to set and then slice and serve.

Recipe Tips
Make sure your heavy cream is cold. If your cream is room temperature when you add it to your stand mixer it won’t whip. It must be ice cold from the fridge before you add it to your stand mixer and whip it up with the other ingredients until it gets beautifully thick.
The best pan to use is a spring form pan with parchment paper lining. This makes it easiest to remove the cheesecake from the pan. If you use a different pie dish then make sure it’s 8 or 9 inches round and fairly deep to fit the cheesecake.
Let it set overnight. It’s best to let the cheesecake set overnight in the fridge. It must be the fridge though, don’t try and make it set faster in the freezer, that won’t work well.

Recipe FAQ
Biscoff has a delicious caramel flavor with hints of cinnamon and ginger. The cookie butter tastes EXACTLY like the cookies. It’s simply divine eaten as is, but as part of other desserts it’s really irresistible.
Keep your cheesecake stored in the fridge and enjoy within 4-5 days.
Once the cheesecake has set in the fridge you can cover it and move it to the freezer where it will stay good for up to 3 months. Thaw in the fridge and then enjoy as usual.

More Biscoff Desserts

Did you make this recipe? Be sure to leave a comment and rating below.

Biscoff Cheesecake
Ingredients
Cookie Crust:
- 8.8 ounces Biscoff Cookies (250g)
- ⅓ cup Butter (75g) Melted
Cheesecake:
- 16 ounces Cream Cheese (450g) Full Fat, Brick Style, Softened*
- ½ cup Powdered Sugar (60g)
- 1 teaspoon Vanilla Extract
- 1 cup Biscoff Cookie Butter (250g)
- 1 ¼ cups Heavy Cream (300ml) Cold
Topping:
- ¼ cup Biscoff Cookie Butter (63g)
- 2 Biscoff Cookies Crushed
Instructions
- Prepare your springform pan. Flip the base of your 8-inch springform pan so that there isn't any lip on the bottom. This will make it easier to get the cheesecake out later.
- Now spray it with non-stick spray and then line the bottom with a square sheet of parchment paper. There is no need to trim the parchment paper to fit. Just place a square sheet of parchment on the bottom and then clip in the sides.
- Now line the sides with strips of parchment paper – this part is optional but does make it really easy to remove the cheesecake later.
- Prepare your cookie crust. Add biscoff cookies to your food processor and process into crumbs.
- Add melted butter and process again until well mixed.
- Transfer the cookie crumbs to your prepared springform pan.
- Take a measuring cup and use the base to press down on your cookie crust from the top, packing it in tightly and making the top really smooth.
- Place the crust into the freezer while you work on your filling.
- Prepare the cheesecake filling. Add the cream cheese, powdered sugar and vanilla extract to your stand mixer and beat until smooth.
- Add in the biscoff cookie butter and beat it in until smooth.
- Now add the heavy cream and beat in until thickened and smooth.
- Spread the cheesecake filling out over the top of the cookie crust and smooth down.
- Place into the fridge to set for at least 6-8 hours and preferably overnight.
- When the cheesecake has set, use the parchment overhang to easily slide it from the springform pan onto your cake stand and then remove the parchment paper.
- Decorate. Add biscoff cookie butter to a microwave safe bowl and microwave in 30-second intervals until melted. Drizzle over the top of your cheesecake and then sprinkle crushed biscoff cookies over the top.
- Place back into the fridge for 10 minutes for the topping to set and then slice and serve.
Notes
- Cream cheese. The best cream cheese to use is the full fat, brick style, firm cream cheese. Don’t use cream cheese from a tub. We love Philadelphia Cream Cheese but any brand that is full fat, brick style will work.
- Biscoff cookie butter. This is a creamy, nut-free spread with a similar consistency to peanut butter. It tastes exactly like the biscoff cookies. If you’re in the USA you’ll find it in most supermarkets in the same section as the peanut butter. Alternatively you can also use Trader Joe’s Speculoos Cookie Butter.
- Heavy cream. This is needed to create the stability of this cheesecake. If you’re outside of the USA then use a thickened cream or whipping cream. Basically it needs to be a high fat cream that will really hold its shape when whipped.
- Make sure your heavy cream is cold. If your cream is room temperature when you add it to your stand mixer it won’t whip. It must be ice cold from the fridge before you add it to your stand mixer and whip it up with the other ingredients until it gets beautifully thick.
- Springform pan. The best pan to use is a spring form pan with parchment paper lining. This makes it easiest to remove the cheesecake from the pan. If you use a different pie dish then make sure it’s 8 or 9 inches round and fairly deep to fit the cheesecake.
- Let it set overnight. It’s best to let the cheesecake set overnight in the fridge. It must be the fridge though, don’t try and make it set faster in the freezer, that won’t work well.
- Storing. Keep your cheesecake stored in the fridge and enjoy within 4-5 days.
- Freezing. Once the cheesecake has set in the fridge you can cover it and move it to the freezer where it will stay good for up to 3 months. Thaw in the fridge and then enjoy as usual.
Flavour was delicious and filling very rich and creamy but the base didn’t hold together at all and the top was quite thin. I’ve made a lot of no-bake cheesecakes before and more typically the cream is whipped first and then folded through and they also tend to include some gelatin for structural integrity. I suspect this would have worked much better for me if I had done it that way.
I mixed up the recipe and only added 1/4 cup of Biscoff butter into the filling will it taste bad?