

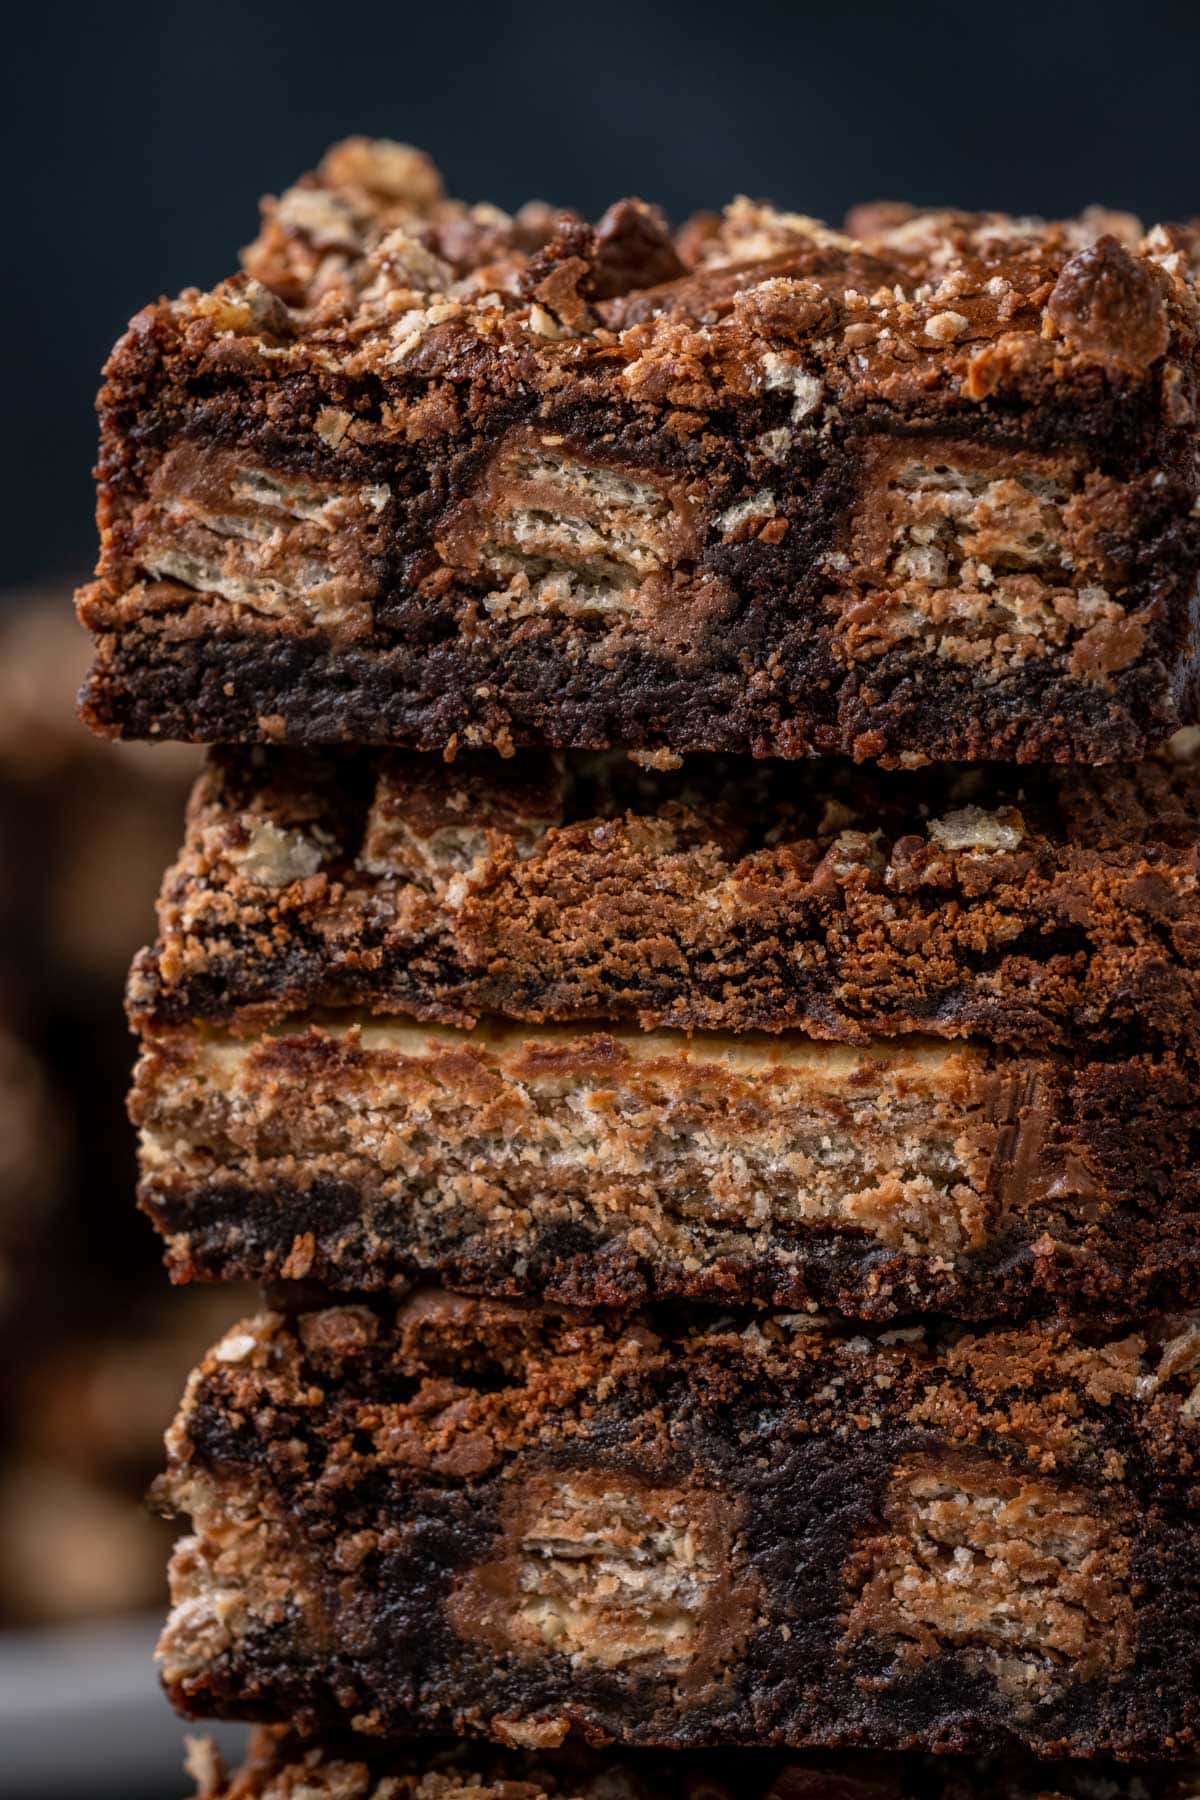
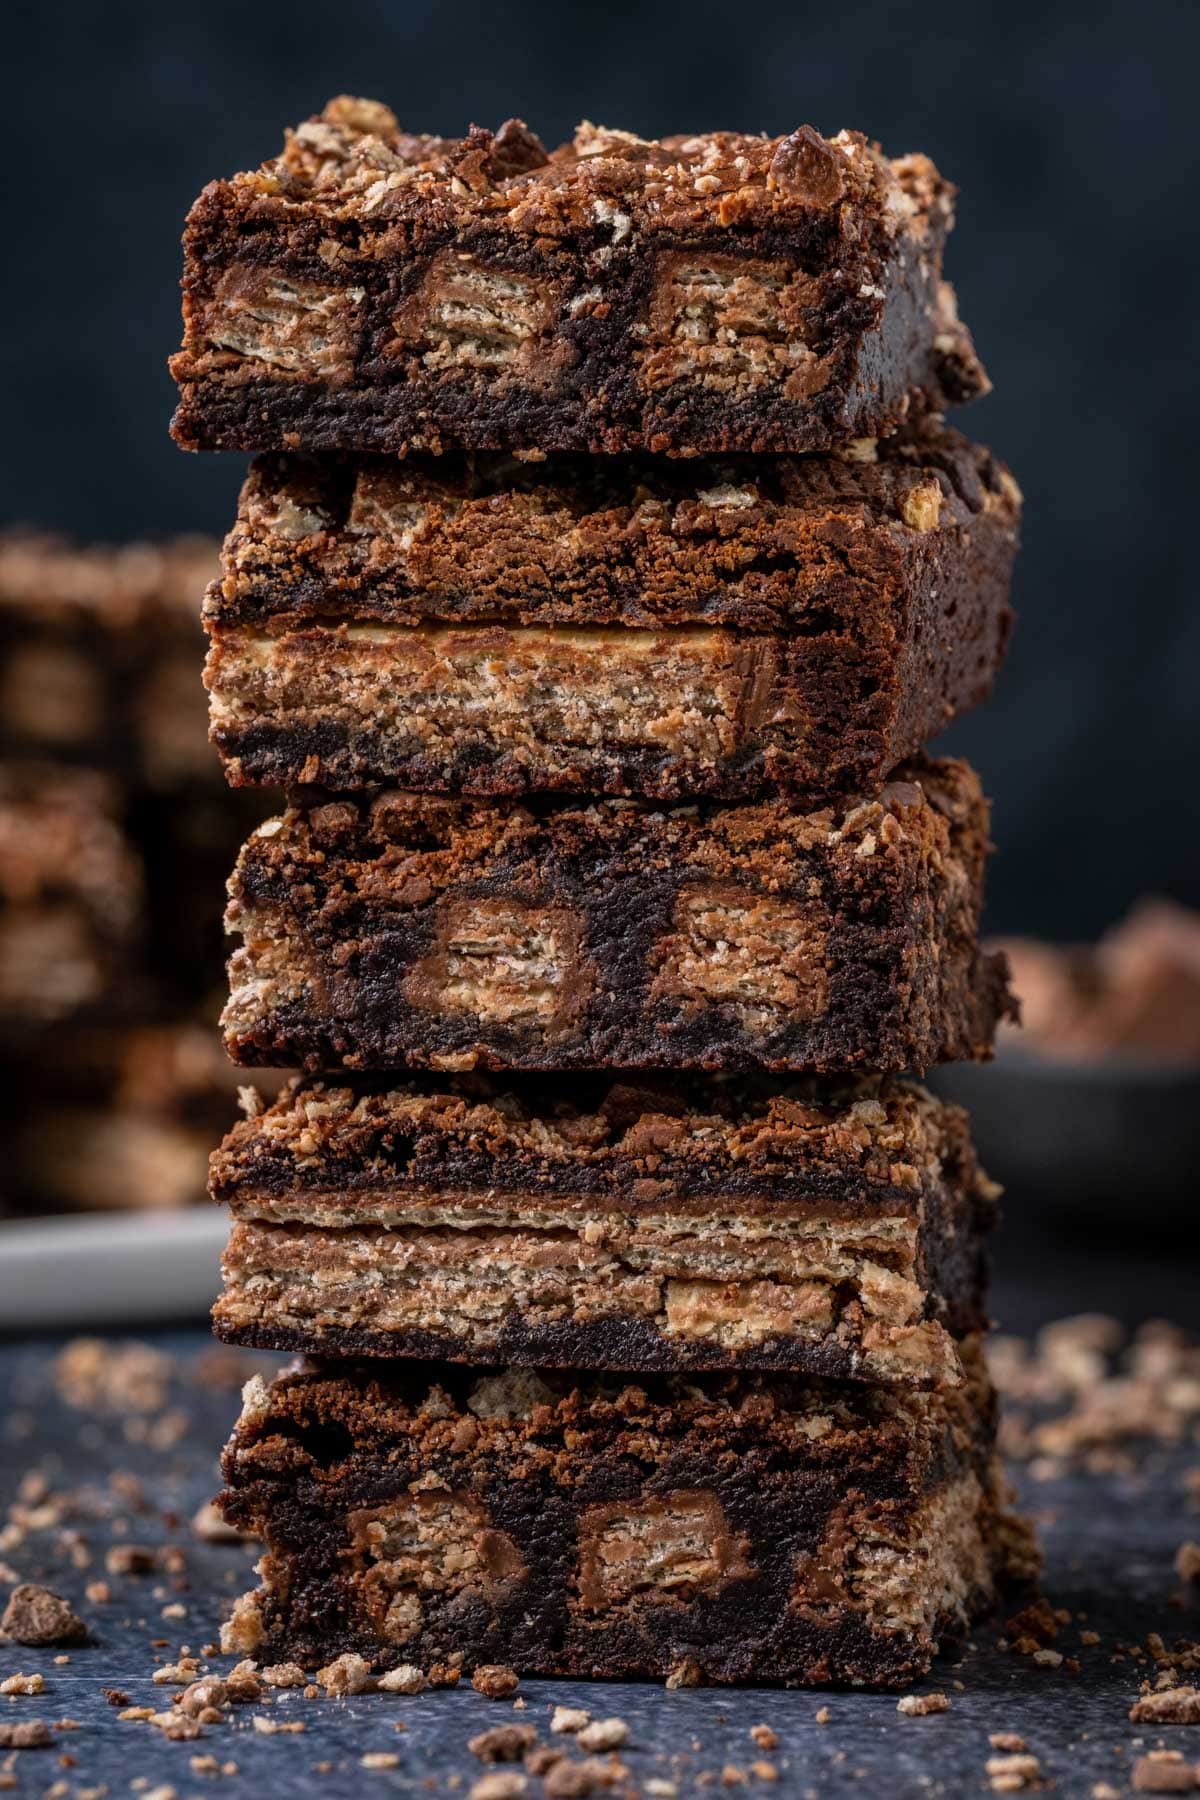
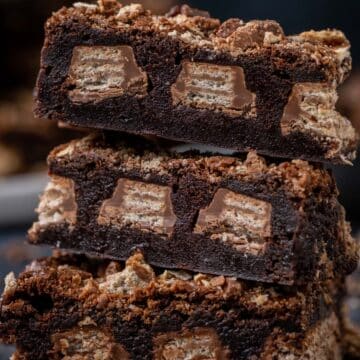
These KitKat Brownies take brownies to a different level! Crunchy yet chewy chocolate brownies, leaving you wanting more after each bite!

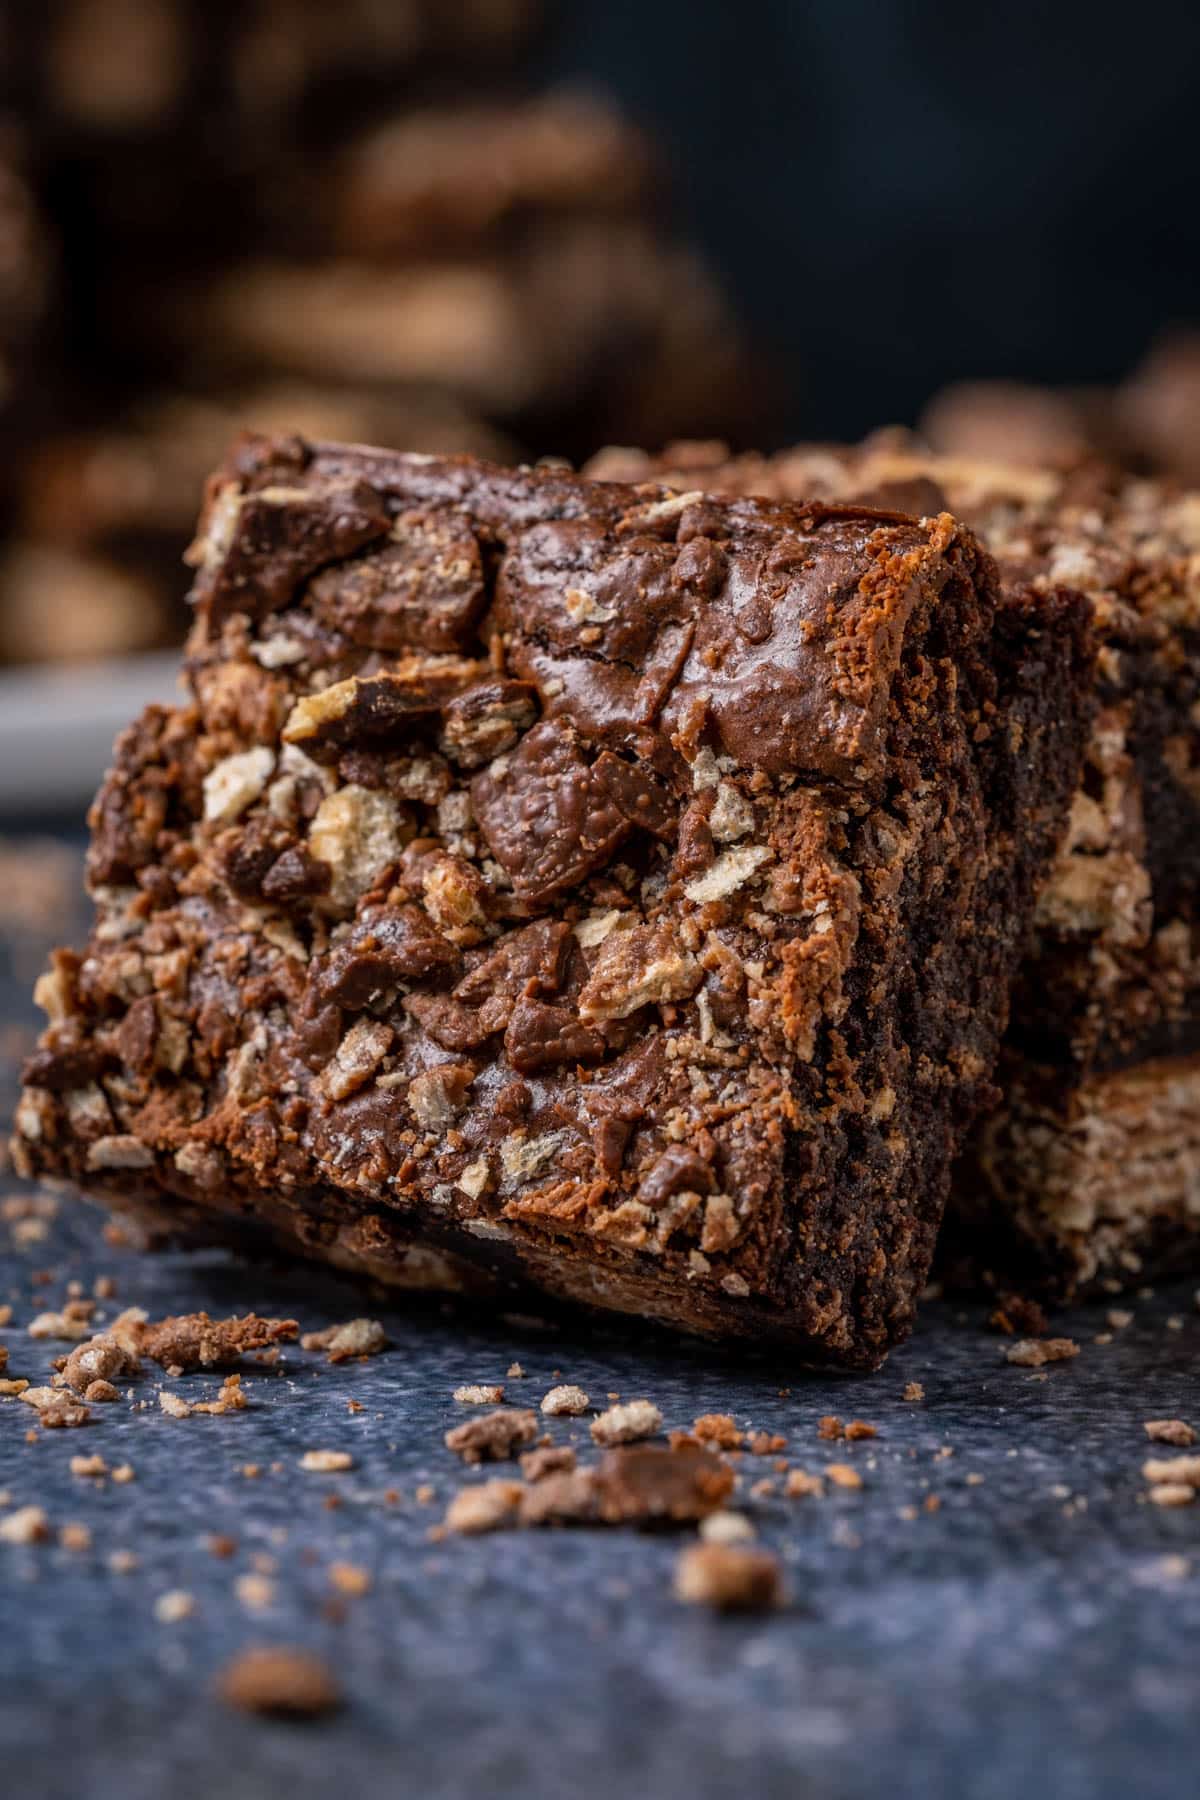
If you’re looking for a delicious and unique dessert, look no further than KitKat Brownies! This classic chocolate treat is taken to the next level with the crunchy addition of KitKats.
Baking with this particular candy bar is simple and yields an irresistible result every time. Making KitKat brownies is a delicious way to enjoy the classic candy bar.
Whether served as a snack or dessert, these decadent KitKat Brownies will surely be a hit with everyone around the block.
This KitKat Brownie recipe will satisfy all your chocolate cravings! It’s super easy and fun to make too.
If you love chocolate recipes, then you can also check out our Chocolate Tiffin, Eggless Chocolate Cupcakes and delicious Chocolate Chip Cookies!
We also have amazing tasting blondies like our Nutella Blondies, Biscoff Blondies and of course the classic Best Blondies recipe.
Ingredients You’ll Need
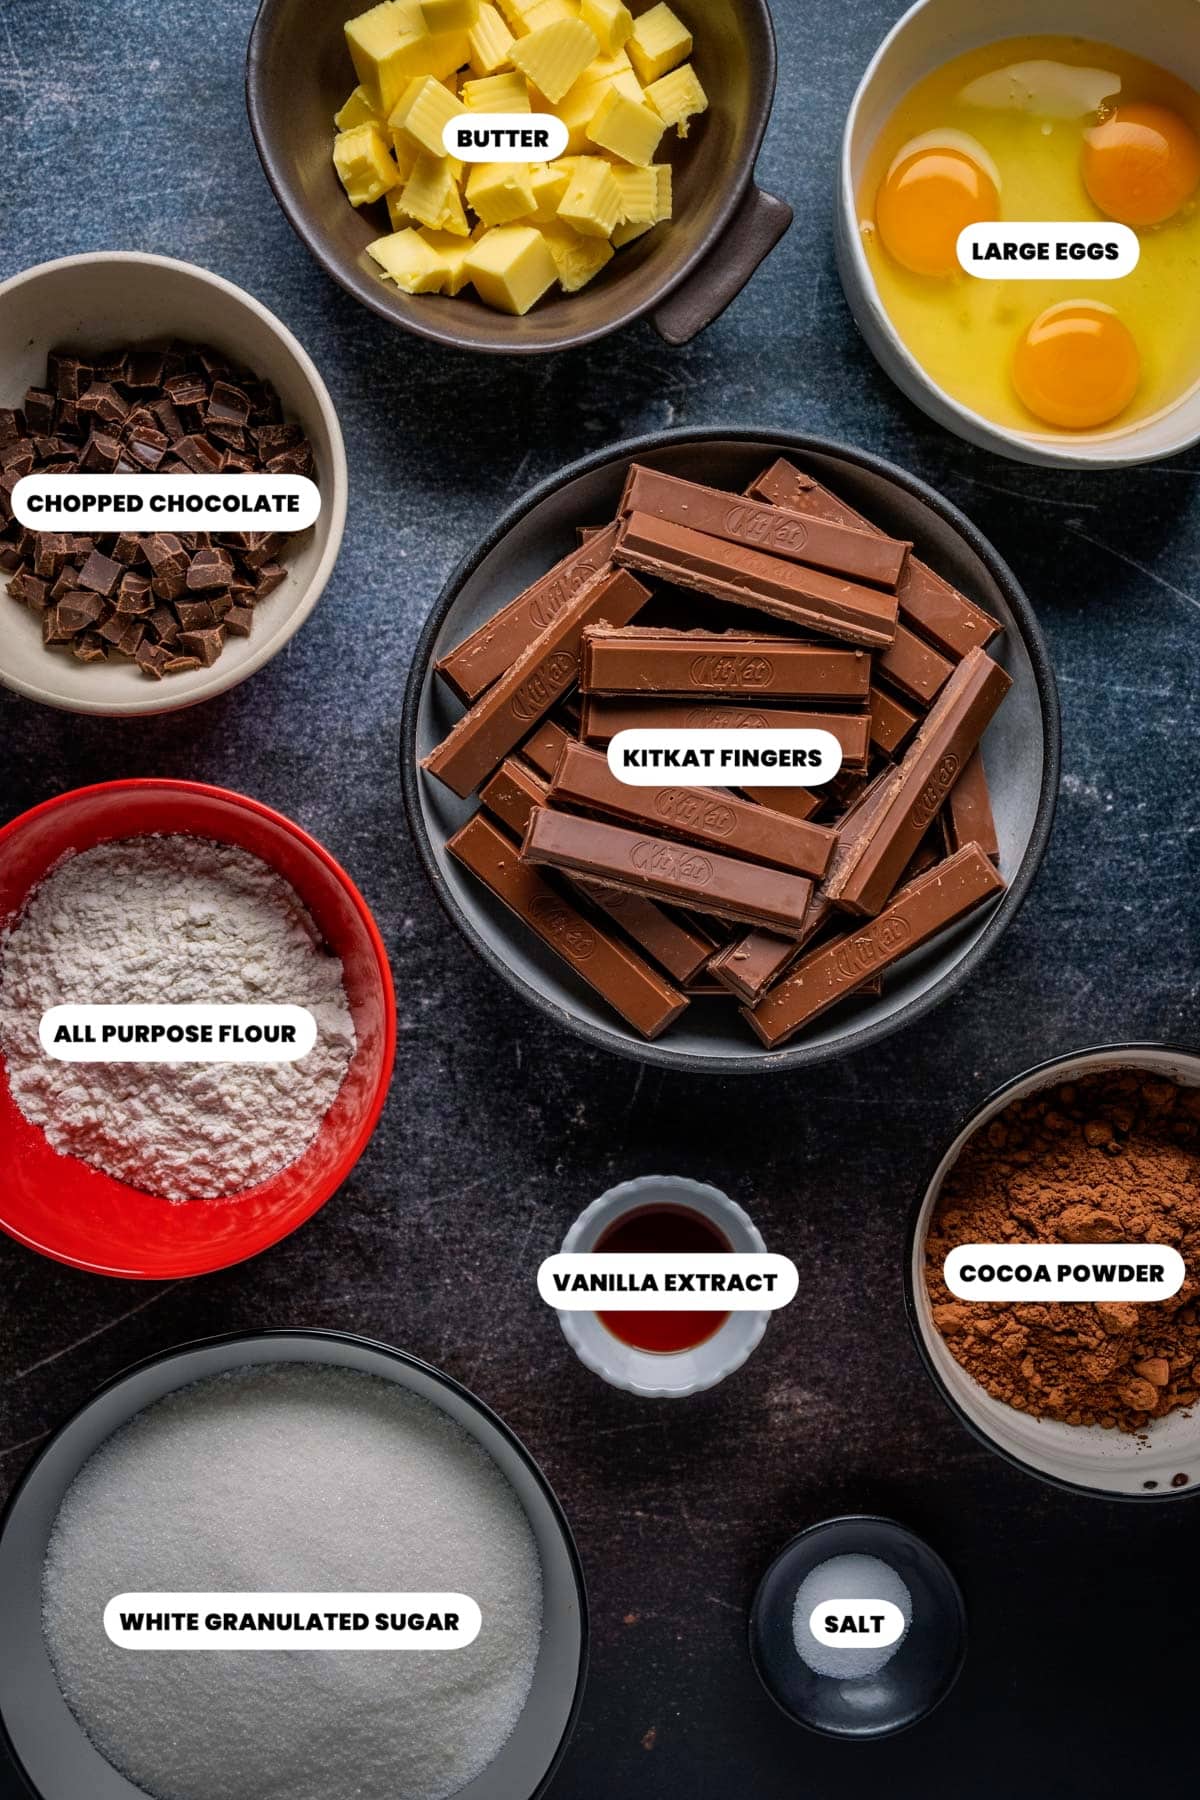
Ingredient Notes
- KitKat Fingers – these are placed whole into the brownie batter and also crushed on top. If you don’t see them in your local supermarket, you can order them from Amazon.
- Cocoa powder – should be natural and unsweetened, something like Hershey’s brand will work great.
- Butter – can be lightly salted or unsalted.
- Chocolate chips – can be milk chocolate chips or dark/semi sweet. We used milk chocolate chips.
How to make KitKat Brownies
Full instructions and measurements can always be found in the recipe card at the bottom of the post. This is a summary of the process to go along with the process photos.
- Sift the all-purpose flour and unsweetened cocoa powder into a bowl, add the salt, and mix together. Set aside.

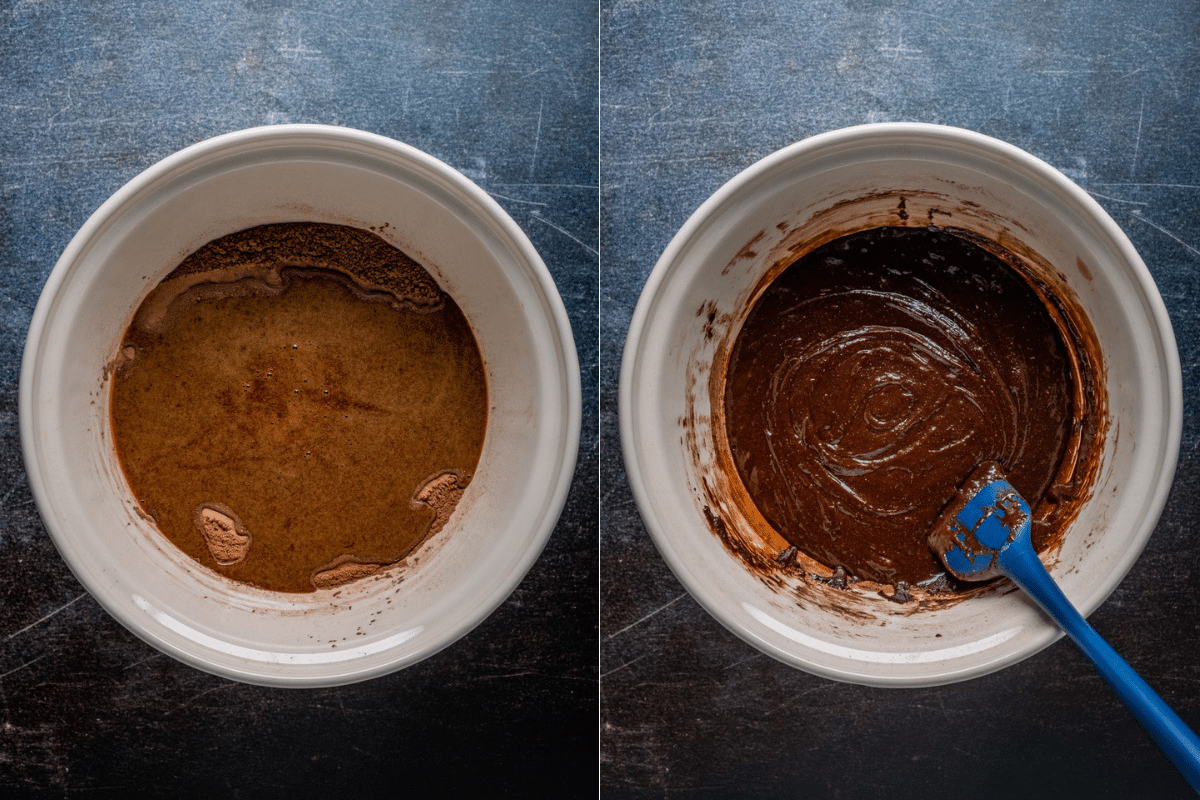
- Add butter to a microwave-safe bowl along with chocolate chips or chopped chocolate and melt them together in the microwave. It doesn’t take too long to melt, so do it in 30 second increments bringing it out to stir every 30 seconds until melted.

- Add the sugar, eggs, and vanilla to the melted butter and chocolate and whisk together until well combined.

- Add the wet ingredients to the dry and mix into a thick batter.
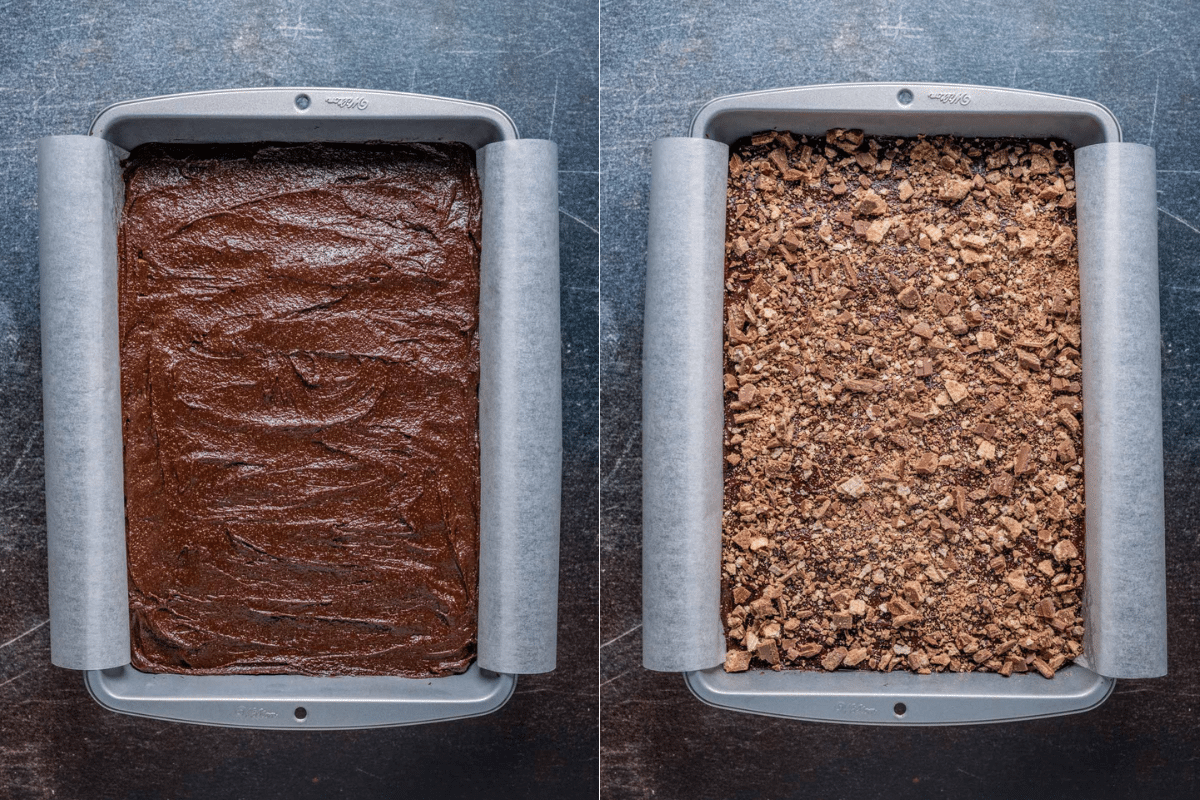
- Transfer half the batter to a 9×13 baking dish sprayed with non-stick spray and lined with a parchment paper overhang, and smooth down. Add the whole KitKat fingers on top of the batter.
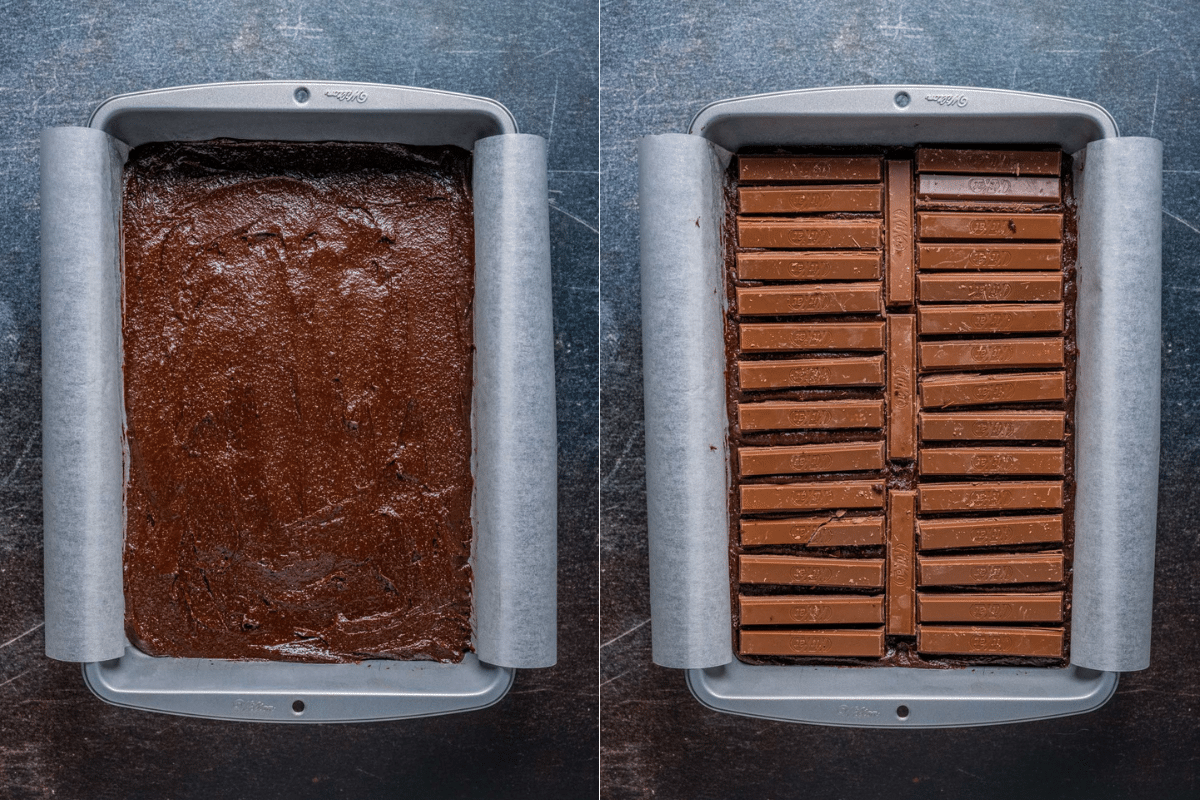
- Then add the remaining brownie batter, spoon it over the KitKats, and spread it out evenly. Sprinkle the top with the remaining crushed KitKats.
- Place into the oven and bake for 30-35 minutes. You will know the brownies are done when they are dry and shiny on top and when a toothpick inserted into the center comes out with melted chocolate or moist crumbs but NO wet batter.
- Let the brownies cool and firm up in the pan before lifting them out with the parchment paper overhang. Let them cool completely before cutting them into squares.

- Cut into squares and enjoy!

Baker’s Tips
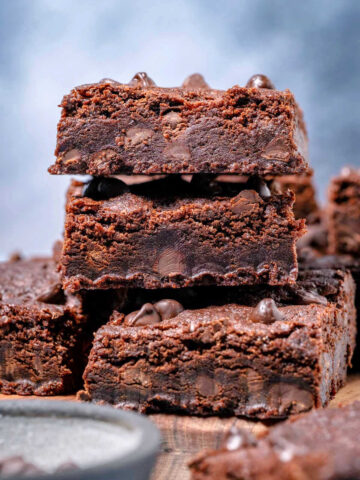
They must be completely cool before slicing. If you’re tempted to slice them too soon then that’s when they crumble. They must be entirely cold before cutting into squares.
For ultra fudgy brownies put them into the fridge for 2 hours before cutting and serving. This makes them super easy to cut and also makes them really super fudgy. I also like to keep them stored in the fridge (in a covered container) as they stay super fudgy.
Storing and Freezing
Keep your brownies stored in an airtight container at room temperature OR in the fridge for up to a week. I prefer them stored in the fridge (in a covered container) as it makes them even more fudgy.
They are also freezer friendly for up to 3 months. Let them cool completely before freezing. Thaw overnight in the fridge and enjoy.
More Delicious Brownie Recipes


Did you make this recipe? Be sure to leave a comment and rating below.
KitKat Brownies
Ingredients
- 1 cup All Purpose Flour (125g)
- 1 cup Cocoa Powder (86g), Unsweetened
- 1 teaspoon Salt
- ¾ cup Butter (170g), Lightly Salted
- ½ cup Chocolate Chips (90g) or Chopped Chocolate
- 2 cups White Granulated Sugar 400g
- 3 Large Eggs
- 2 teaspoons Vanilla Extract
- 40 KitKat Fingers 32 fingers for the middle, 8 fingers to break up for the top
Instructions
- Preheat the oven to 350°F (180°C), spray a 9×13 baking dish with non-stick spray, and line it with parchment paper so that there is an overhang on either side. Set aside.
- Sift the all-purpose flour and cocoa powder into a mixing bowl, add the salt, and mix together. Set aside.
- Add the butter and ½ cup chocolate chips or chopped chocolate to a microwave-safe bowl and microwave in 30 second intervals, bringing it out to stir every 30 seconds until melted.
- Add the sugar, eggs, and vanilla to the melted butter and chocolate and whisk together until well mixed.
- Add the wet ingredients to the dry and mix into a thick batter.
- Transfer half the batter to the prepared 9×13 dish and smooth down.
- Add the whole KitKat fingers on top, then add the remaining brownie batter, spoon it over the KitKats, and spread it out evenly. Sprinkle the top with the remaining crushed KitKats.
- Place into the oven and bake for 30-35 minutes. You will know the brownies are done when they are dry and shiny on top and when a toothpick inserted into the center comes out with melted chocolate or moist crumbs but NO wet batter.
- Let the brownies cool and firm up in the pan before lifting them out with the parchment paper overhang. Let them cool completely before cutting them into squares.
Notes
- Measure the flour correctly using the spoon and level method. Spoon it into your measuring cup and then level off the top with a knife. Don’t scoop it and don’t pack it into your cup. Alternatively, weigh it on a food scale. Click ‘metric’ below the list of ingredients to get the correct weight in grams.
- KitKat Fingers– these are placed whole into the brownie batter and also crushed on top. Super tasty! If you don’t see them in your local supermarket, you can order them from Amazon.
- For ultra fudgy brownies put them into the fridge for 2 hours before cutting and serving. This makes them super easy to cut and also makes them really super fudgy.
- Storing: Keep your brownies stored in an airtight container at room temperature OR in the fridge for up to a week. I prefer them stored in the fridge (in a covered container) as it makes them even more fudgy.
- Freezing: They are freezer friendly for up to 3 months. Let them cool completely before freezing. Thaw overnight in the fridge.
Leave a Reply